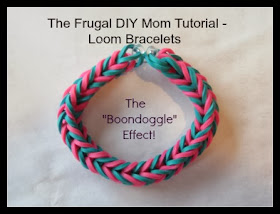
Not only have I made this post about it, but I also created a youtube tutorial about it! Whaaaatttt? Relax, I did it just because it is a bit easier to follow the video for some people. Ain't nobody got time to make a video every day! :)

So, this post is about making the popular "Boondoggle" style from the '90s...who's with me? Yep, I spent hours with that fluorescent plastic stuff thinkin' I was cool! Well. Here I am again over 20 years later! And still cool? :)
Well, if you are still reading this, then I don't feel so bad. I guess you want to be as "cool" as me! So, let's get down to business!
First, gather your loom, hook , clip and bands that you are going to use. I am using pink and teal for my daughter's bracelet. I am going to alternate colors each time, single bands. She's been so busy making everyone else bracelets that she doesn't even have one yet!
This loom is from Walmart. You can get them at Jo-Ann Fabrics and Michaels or Hobby Lobby, too!
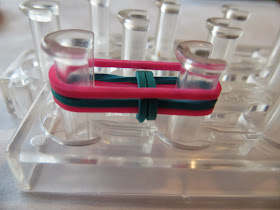
Start out by taking your first band and making it look like a "figure 8" by twisting it in half. Then place on the loom. I pick the corner of the loom, it is much easier!
You should now have three bands, one on top of the other.
Now, take your hook and grab one side of the bottom band that has the "figure 8".
Pull the loop over that side of the loom so that band goes to the middle.
Now, do the same with the opposite side of the bottom "figure 8" band.
Next, take your finger and push the middle of the bands down in order to make room for the next band to go on top. Make sure the layers do not get twisted around each other on the loom and mess up the order.
Now it is time to add your fourth band. Remember to alternate colors if that's what you chose:
You're doing good! :) Now, you are just going to keep repeating the steps above by hooking the bottom loop and pulling each side over their respective top. Do this until you have the length you desire. Don't forget that you need to keep pushing them down in the middle and pulling the "tail" toward the outside of the loom when you begin to see it.
OK, it is time to put your clip on! There are many kinds, ours is a C-clip. Yours may look like an "S".
First, take off the bracelet by holding the loom end (right in the middle of where the loops cross) so that you don't unravel it. You will see that two bands are not connected. These will pull right out, so go ahead and remove them after you have hooked your last bottom loop over.
Now, you will be left with one end that looks like this after you remove the 2 loose bands:
Now, you are just going to connect your clip by hooking both of these loops together into it.
Now, take the opposite end of the bracelet and connect that side to the clip as well!
Now, go make one for your kiddo who will think you are really cool! Well, hopefully! At least you can teach them, right?:)
Still not getting it? Here's the link to the video tutorial!
Got a great design for an easy bracelet? Comment below and let me know!
Don't forget to check the long list of my other DIY projects including the Sharpie Mug, Swiffer Refills, Disney Ears & Seat Belt Pillows!
Like this tutorial? Share it on FB, Tweet & Pin for later! :)


No comments:
Post a Comment